| Stateflow | |
Create New Objects in the Chart
In the previous section, you created a handle to the new Chart object, chart. Continue by creating new objects for your chart using the following steps:
Stateflow.State is the object type for a state, chart is a workspace variable containing a handle to the parent chart of the new state, and sA is a workspace variable to receive the returned handle to the new state.
An empty state now appears in the upper left-hand corner of the diagram editor.
chart.view command to bring the chart diagram editor to the foreground for viewing.
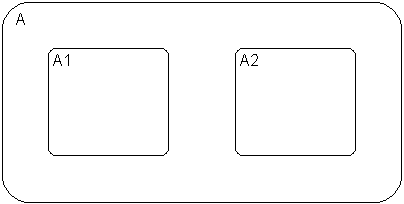
sA, sA1, and sA2 as handles to the new states, which now have the following appearance:
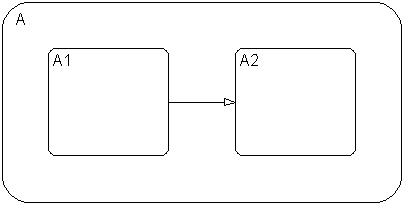
E1 to the transition from state A1 to state A2 with the following command:
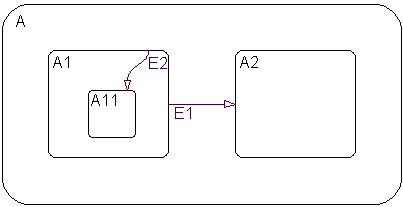
E2 to the transition from state A1 to state A11 with the following command:
Both the state and transition labels in our example are simple one-line labels. To enter more complex multiline labels, see Entering Multiline Labels. Labels for transitions also have a LabelPosition property that you can use to move the labels to better locations.
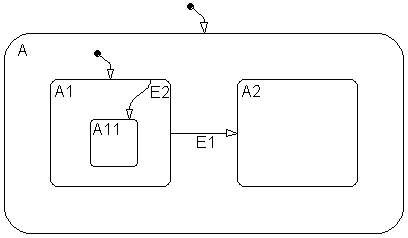
dtA = Stateflow.Transition(chart)
dtA.Destination = sA
dtA.DestinationOClock = 0
xsource = sA.Position(1)+sA.Position(3)/2-10
ysource = sA.Position(2)-20
dtA.SourceEndPoint = [xsource ysource]
dtA1 = Stateflow.Transition(chart)
dtA1.Destination = sA1
dtA1.DestinationOClock = 0
xsource = sA1.Position(1)+sA1.Position(3)/2-10
ysource = sA1.Position(2)-20
dtA1.SourceEndPoint = [xsource ysource]
myModel.mdl with the following command:
Id property of the Machine object m for saving the model under a new name.
You are now finished with the Quick Start for the Stateflow API section of this chapter. You can continue with the next section (Accessing the Properties and Methods of Objects), or you can go to the section Creating a MATLAB Script of API Commands to see how to create a script of the API commands you used in this Quick Start section.
| | Access the Chart Object | Accessing the Properties and Methods of Objects | |