| Wavelet Toolbox | |
One-Dimensional Analysis Using the Graphical Interface
In this section, we explore the same electrical consumption signal as in the previous section, but we use the graphical interface tools to analyze the signal.
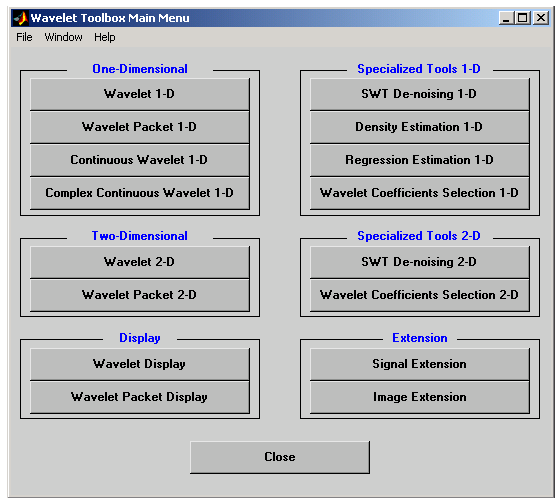
The Wavelet Toolbox Main Menu appears.
Click the Wavelet 1-D menu item.
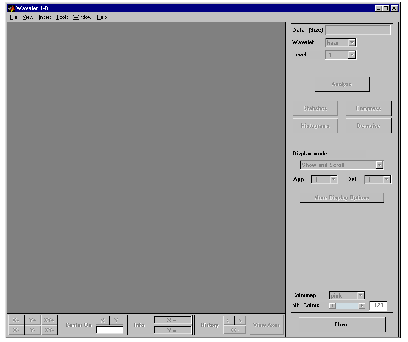
The discrete wavelet analysis tool for one-dimensional signal data appears.
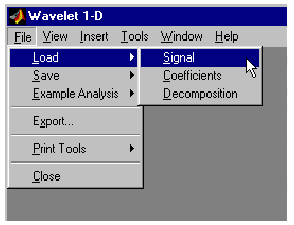
 Signal option.
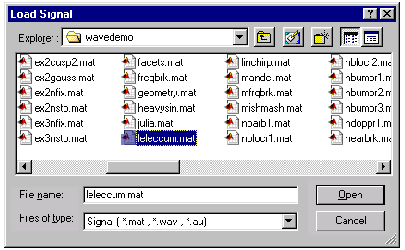
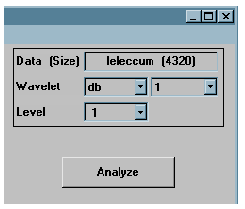
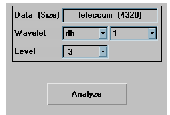
When the Load Signal dialog box appears, select the demo MAT-file leleccum.mat, which should reside in the MATLAB directory toolbox/wavelet/wavedemo. Click the OK button.
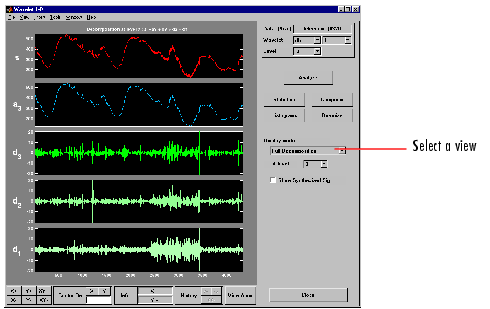
The electrical consumption signal is loaded into the Wavelet 1-D tool.
db1 wavelet, just as we did using the command line functions in One-Dimensional Analysis Using the Command Line.
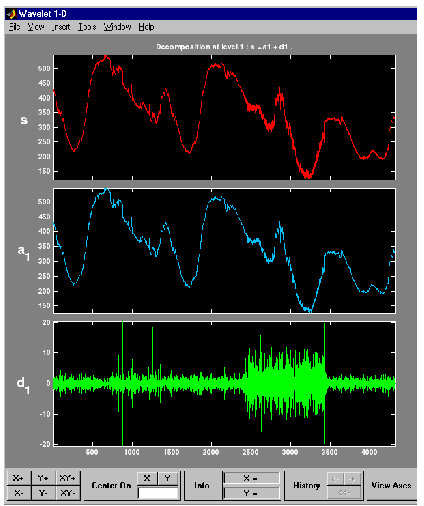
In the upper right portion of the Wavelet 1-D tool, select the db1 wavelet and single-level decomposition.
After a pause for computation, the tool displays the decomposition.
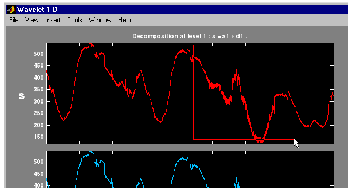
Drag a rubber band box (by holding down the left mouse button) over the portion of the signal you want to magnify. Here, we've selected the noisy part of the original signal.
Click the X+ button (located at the bottom of the screen) to zoom horizontally.
The Wavelet 1-D tool zooms all the displayed signals.
The other zoom controls do more or less what you'd expect them to. The X- button, for example, zooms out horizontally. The history function keeps track of all your views of the signal. Return to a previous zoom level by clicking the left arrow button.
db1 wavelet:
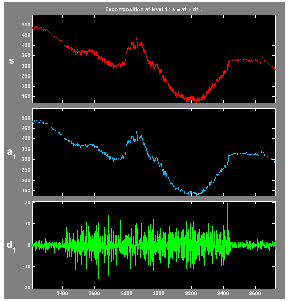
Simply select 3 from the Level menu at the upper right, and then click the Analyze button again.
After the decomposition is performed, you'll see a new analysis appear in the Wavelet 1-D tool.
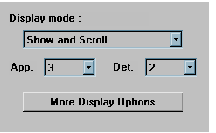
Selecting Different Views of the Decomposition
The default display mode is called "Full Decomposition Mode." Other alternatives include
You can change the default display mode on a per-session basis. Select the desired mode from the View Default Display Mode submenu.
| Note The Compression and De-noising windows opened from the Wavelet 1-D tool will inherit the current coefficient visualization attribute (stems or colored blocks). |
These options include the ability to suppress the display of various components, and to choose whether or not to display the original signal along with the details and approximations.
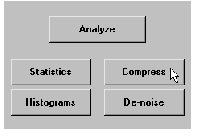
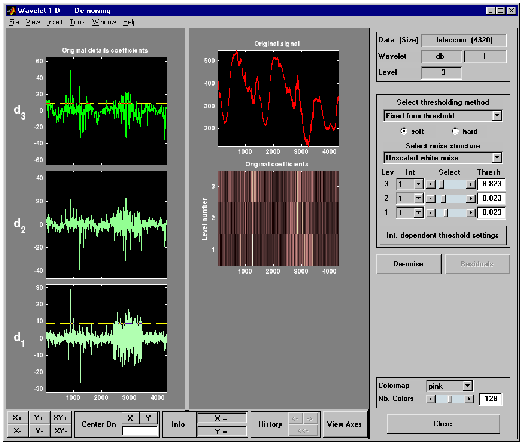
Bring up the de-noising tool: click the De-noise button, located in the middle right of the window, underneath the Analyze button.
The Wavelet 1-D De-noising window appears.
While a number of options are available for fine-tuning the de-noising algorithm, we'll accept the defaults of soft fixed form thresholding and unscaled white noise.
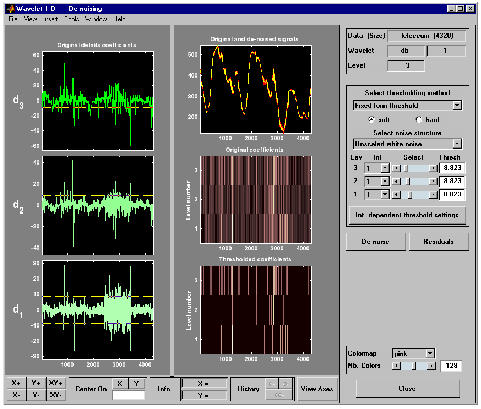
Continue by clicking the De-noise button.
The de-noised signal appears superimposed on the original. The tool also plots the wavelet coefficients of both signals.
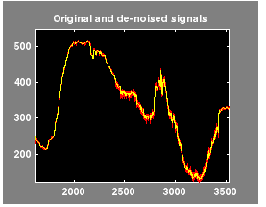
Zoom in on the plot of the original and de-noised signals for a closer look.
Drag a rubber band box around the pertinent area, and then click the XY+ button.
The De-noise window magnifies your view. By default, the original signal is shown in red, and the de-noised signal in yellow.
Dismiss the Wavelet 1-D De-noising window: click the Close button.
You cannot have the De-noise and Compression windows open simultaneously, so close the Wavelet 1-D De-noising window to continue. When the Update Synthesized Signal dialog box appears, click No. If you click Yes, the Synthesized Signal is then available in the Wavelet 1-D main window.
db1. Let's refine our analysis of the electrical consumption signal using the db3 wavelet at level 5.
Select 5 from the Level menu at the upper right, and select the db3 from the Wavelet menu. Click the Analyze button.
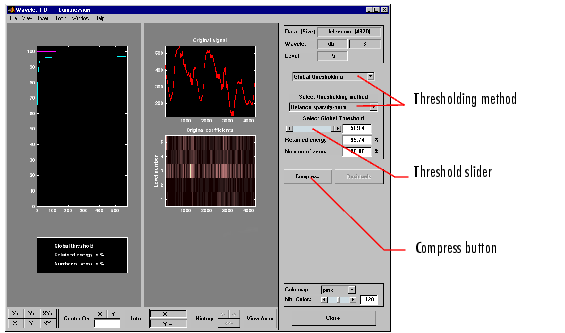
Bring up the Compression window: click the Compress button, located in the middle right of the window, underneath the Analyze button.
The Compression window appears.
While you always have the option of choosing by level thresholding, here we'll take advantage of the global thresholding feature for quick and easy compression.
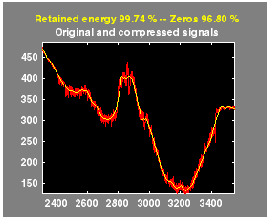
After a pause for computation, the electrical consumption signal is redisplayed in red with the compressed version superimposed in yellow. Below, we've zoomed in to get a closer look at the noisy part of the signal.
You can see that the compression process removed most of the noise, but preserved 99.74% of the energy of the signal. The automatic thresholding was very efficient, zeroing out all but 3.2% of the wavelet coefficients.
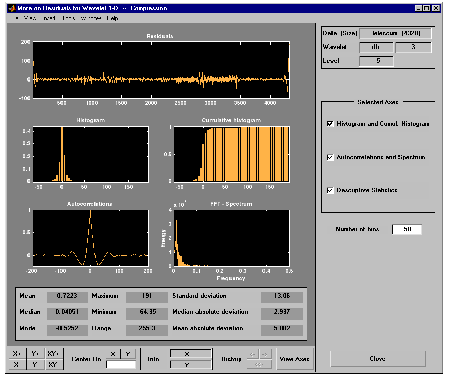
Displayed statistics include measures of tendency (mean, mode, median) and dispersion (range, standard deviation). In addition, the tool provides frequency-distribution diagrams (histograms and cumulative histograms), as well as time-series diagrams: autocorrelation function and spectrum. The same feature exists for the Wavelet 1-D De-noising tool.
Dismiss the Wavelet 1-D Compression window: click the Close button. When the Update Synthesized Signal dialog box appears, click No.
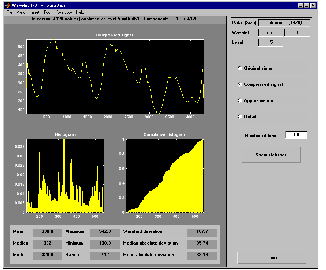
From the Wavelet 1-D tool, click the Statistics button.
The Wavelet 1-D Statistics window appears displaying by default statistics on the original signal.
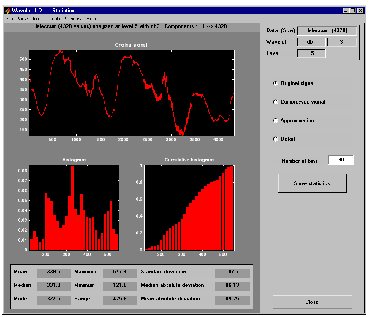
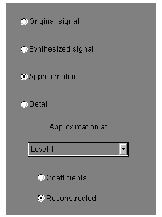
Select the synthesized signal or signal component whose statistics you want to examine. Click on the appropriate radio button, and then press the Show Statistics button. Here, we've chosen to examine the compressed signal using more 100 bins instead of 30, which is the default:
Displayed statistics include measures of tendency (mean, mode, median) and dispersion (range, standard deviation).
In addition, the tool provides frequency-distribution diagrams (histograms and cumulative histograms). You can plot these histograms separately using the Histograms button from the Wavelets 1-D window.
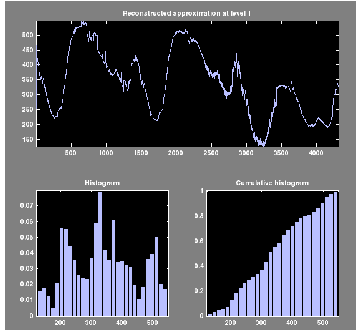
Select the Approximation radio button. A menu appears from which you choose the level of the approximation you want to examine.
Select Level 1 and again click the Show Statistics button. Statistics appear for the level 1 approximation.
| | One-Dimensional Analysis Using the Command Line | Importing and Exporting Information from the Graphical Interface | |