

| Getting Started | |
Adding a Lead Network
Improving the rise time requires that you increase the compensator gain, but increasing the gain further deteriorates the gain and phase margins while increasing the overshoot. You need to add a lead network to selectively raise the gain about the frequency crossover.
To add a lead network, select Add Pole/Zero and then Lead from the right-click menu. Your cursor turns into a red `x'. Left click along the Nichols curve to add the lead network. To move the lead network along the curve, left-click on the pole or zero and drag.
This figure shows the process of moving the lead network pole using the mouse (the open-loop Bode diagram has been removed for clarity).
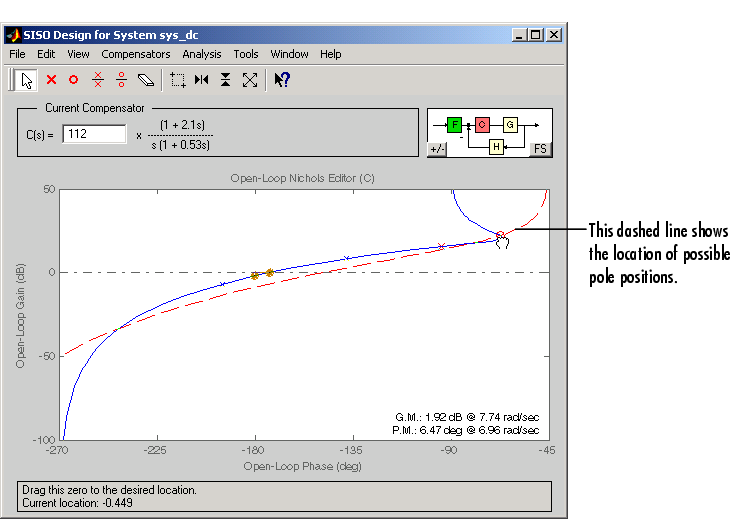
Figure 4-47: Moving the Lead Network's Pole
You can track the pole's movement in the Status Panel at the bottom of the SISO Design Tool. The Status Panel tells you the current location of the pole.
For this design, move the lead network pole to -28 and the zero to -4.3. The zero should be almost on top of the rightmost pole of the plant (the DC motor model). Adjust the compensator gain to 84. This gives the final design.
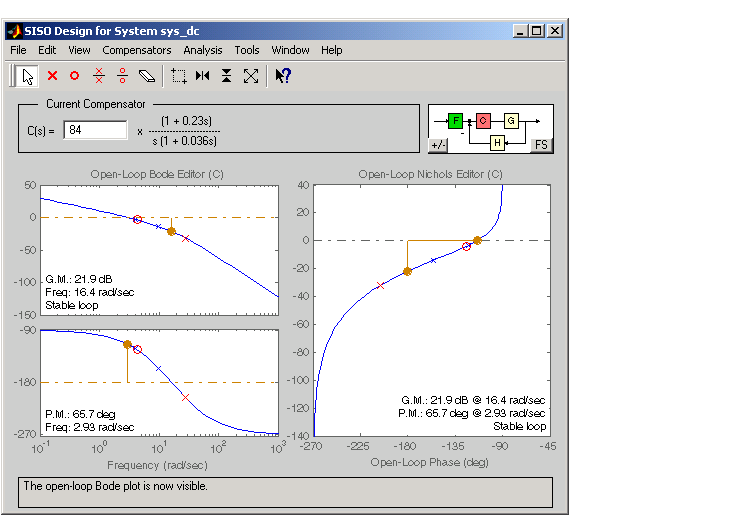
Figure 4-48: Final Nichols Plot Design for the DC Motor Compensator
The gain and phase margins are 21.9 dB and 65.7 degrees, respectively. Inspect the closed-loop step response to see if the rise time and overshoot requirements are met.
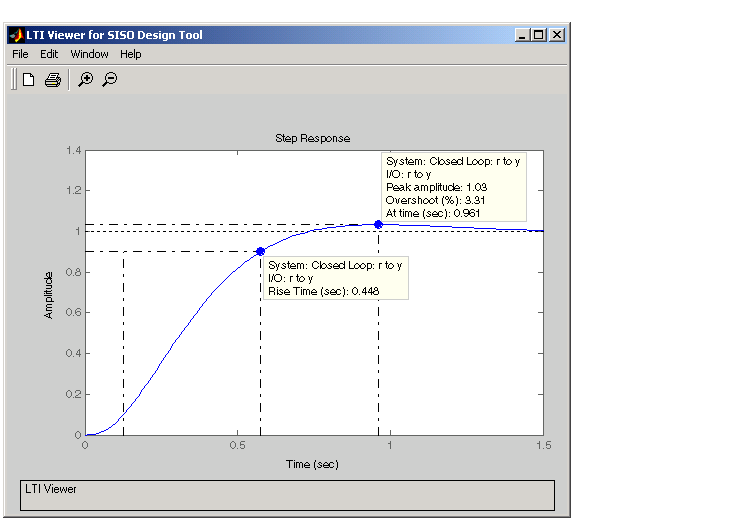
Figure 4-49: Closed-loop Step Response for the Final Compensator Design
As this figure shows, the rise time is 0.448 second, and the overshoot is a little over 3%. This satisfies the rest of the design requirements.
| | Adding an Integrator | Functions For Compensator Design | |