These instructions are an augmented and HTMLified version of the hardcopy
manual provided by the vendor. This hardcopy manual is kept in the
CFS Offices, where it may be
consulted.
Scanning
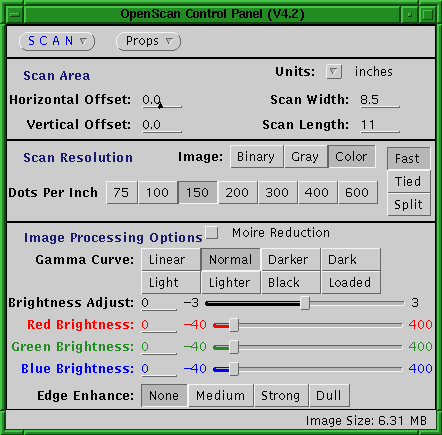
To start a scan, place a document on the glass bed of the scanner. Then
click the  button with the left mouse button.
The scanner will then start the scan of a full page at the default
resolution. Once the scan is completed you will then see a pop-up image
data window appear on your screen. While the scan is under way, the
 will change into an
  button. Selecting the Abort button while the scan is in
progress will cause a dialog box to appear, allowing the
abort action to be confirmed or cancelled. If the abort is confirmed,
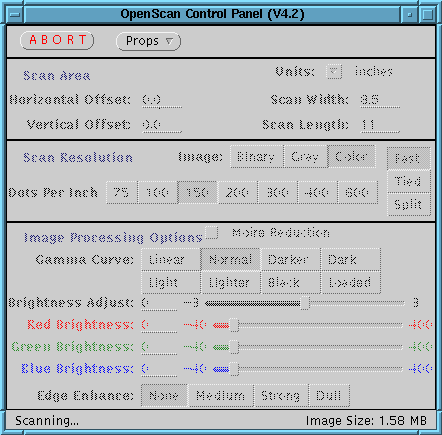
the scan operation is terminated and no image data is displayed. While
the scan is underway, all OpenScan control panel items are grayed-out
and not selectable, as shown in the figure below.

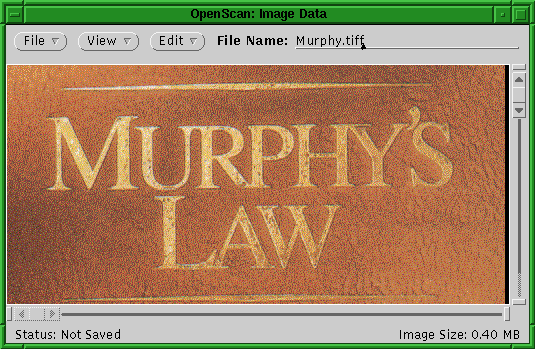
OpenScan Image Data Window

This window displays the result of the scan at full resolution on your
workstation screen. Note that since the default scan resolution is 150 dpi
(dots per inch) and your screen displays at 75-100 dpi, only the very top
lefthand corner of the image will currently be visible.
Moving the Image
To view more of the image, you can scroll the visible area it in the window
with one of two ways.
One method is to use the scroll bars on the right side and the bottom of
the image to cause the a different region of the image to scroll into
view. You can move the scroll bars

by pulling
on the arrow sections with the left mouse button. This will cause the image
to scroll smoothly in the window. If your workstation has very little
memory or is slow, then the overhead associated with smooth scrolling
may make this take some time. In this case you will want to move the
image by grabbing the scroll bar handle by the middle empty section and
pulling it in the direction of the region you want to view.
Another method for veiwing a different portion of the image is to pan the
image using the mouse in the OpenScan Image Data Window. To do this,
place the mouse cursor in the center of the image in the OpenScan Image
Data Window. While holding down the left mouse button, move the mouse to
the left, right, up, or down. Using this technique you can "push" the
image around the window causing different regions to become viewable.
Saving the Image
To save the image to a file, simply click the left mouse button on the
line to the right of the File Name label:

Type in the file name (or file path name) including the extension
.tiff
(by default, OpenScan saves the images as TIFF files so it is important
that you add .tiff after the filename) to which you wish to save
the image and move the mouse to the  button and press
the left mouse button. Your image should now be saved.
Preview Scanning
It is often convenient to first scan a new image at a very low resolution
so that the entire page will be visible in the OpenScan Image Data Window.
This low resolution image can then be used to interactively select the
desired scan area (sometimes referred to as "cropping" the image.)
To perform the preview scan, move the mouse cursor over the
 button and the hold down the right
mouse button and then a menu similar to the figure below should appear.

While holding
down the right mouse button, slide the mouse downward until the
Preview selection is highlighted. Releasing the right mouse
button while Preview is highlighted will initiate a preview scan.
Preview will scan the page at all the current settings except for the
scan resolution which will be 75 dpi and the scan area will be 8.5"
by 11". The OpenScan Preview Image Data window will the appear with the
entire page viewable.
If you wish to preview a page size other than 8.5" by 11", then you
may use the right menu on the Preview option to select other
standard page sizes. To use the right menu, hold the right mouse button
down and move the mouse down until Preview is highlighted, then
move the mouse to the right through the arrow and another menu will
appear. The standard page sizes will be shown.
To interactively select the scan area, move the mouse into the Image Data
Window and position the mouse cursor at one of the corner points you
wish to start scanning at. Now hold down the middle mouse button
and drag the mouse to the opposite corner of the region selected and
then release the mouse button. You will notice that a box is drawn, as
shown below, in the Image Data Window to show you the selected scan area.
Now press the scan button to begin the scan.

Troubleshooting
Due to memory limitations, the scanner may not scan large images at high
dpi. Thus you must lower the dpi for the scan. If the problem persists even
in the lower range dpi, then power cycle the scanner by turning it of for
10 seconds then turning it on. This should clear things up. If the scanner
cannot be reinitialized, then power-cycle the scanner to resolve this
problem.
If these or any other problems persist, please contact the
CFS Staff.
2145 Sheridan Road . Evanston / IL . 60208
Phone: 847-491-8140 . FAX: 847-491-4455
webmaster@ece.northwestern.edu
Copyright © 2003
Northwestern University
§ All rights reserved § Tue Nov 4 14:18:54 CST 2003
 button with the left mouse button.
The scanner will then start the scan of a full page at the default
resolution. Once the scan is completed you will then see a pop-up image
data window appear on your screen. While the scan is under way, the
 will change into an
  button. Selecting the Abort button while the scan is in
progress will cause a dialog box to appear, allowing the
abort action to be confirmed or cancelled. If the abort is confirmed,
the scan operation is terminated and no image data is displayed. While
the scan is underway, all OpenScan control panel items are grayed-out
and not selectable, as shown in the figure below.


 button and press
the left mouse button. Your image should now be saved.

